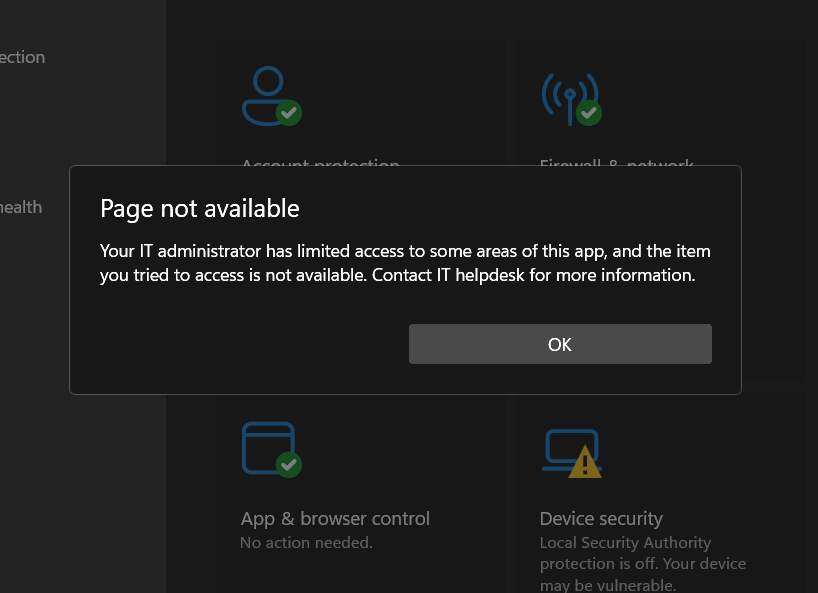
Windows 10 and 11 users may sometimes encounter a “Virus and threat protection page not available” message. Although this message doesn’t necessarily mean that your computer is infected, the absence of this critical security feature is not a good sign. It leaves your PC vulnerable to potential attacks.
There are several reasons for this, and we will explore them further below. It is worth clarifying that it is normal for such a message to appear on a corporate device. But this is not all right if you see this on a Home PC. Today, I’ve gathered the most effective ways to fix this issue.
“Virus and Threat Protection Page Not Available” – What Does It Mean?
The message “Virus and Threat Protection Page Not Available” indicates trouble accessing Windows Security features. This means that, for some reason, the application cannot display the interface requested by the user. The virus and threat protection page comprehensively overviews your device’s security status. It displays relevant information about the antivirus software you are using, your device’s firewall status, and other enabled security features.
Windows Security is a built-in antivirus software developed by Microsoft. Initially, it was designed to protect against simple security threats like malware or viruses. However, now it’s an all-in-one tool that includes complex defense against phishing and other cyber attacks. It includes Virus and threat Protection, Account Protection, Firewall and network Protection, App and Browser Control, Device Security, Device Performance and health, and Family Options. Well, this doesn’t always work out properly, and now I will tell you why.
Why Is The Virus And Threat Protection Page Not Available?
Usually, to access Windows Security, you click on the Windows Security icon from the taskbar, or open the menu from the settings. If everything works correctly, you can access the menu with no problems. However, if Windows Security is unavailable, an error message will appear saying “Page not available”. Here are a few reasons for this to happen.
Specific OS edition.
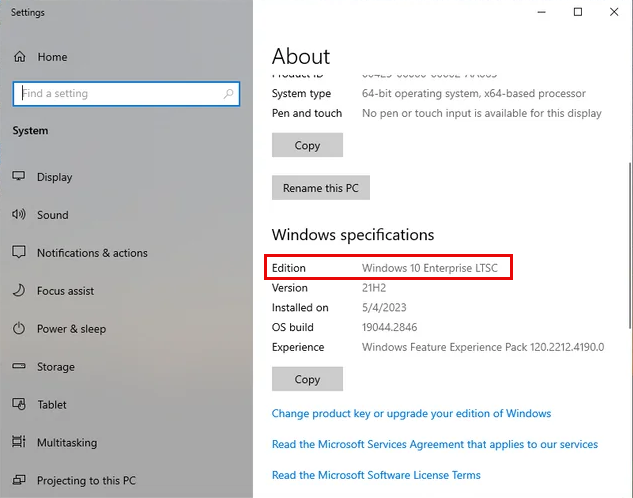
Windows Enterprise or LTSC editions can have security features disabled by default. You can see the edition of your Windows copy by going to Settings → System → About, and checking the Windows specifications.
Normally, it is possible to change the security settings back to normal. I will show you how to do this later in this post.
Improper OS settings after the reset
After resetting your OS, the virus and threat protection settings may not be configured correctly. Reasons for this are particularly hard to trace, but figuring that out is in fact just a waste of time. You can solve the issue in just a few clicks in this case.
Windows ISO obtained from unofficial sources
Obtaining a Windows image from questionable or pirated sources can result in missing or disabling essential security features. This is because the authors of such builds often try to make them as easy as possible by disabling “unnecessary” features. It is noteworthy that the antivirus function is often the first to be disabled.
Incompatibility with third-party antivirus
Sometimes, third-party antivirus tools may not be compatible with Windows Security. This is because two or more antimalware apps try to control or modify the same system resources simultaneously. This can lead to conflicts, malfunctions, or even complete functionality disabling.
Malware activity
Malware compromising system security settings could cause the “virus and threat protection page not available” notification. It can cause severe damage to your system, including data loss and theft. Since most average users only use the built-in Windows protection, any malware will obviously try to neutralize it first.
How to Fix the Virus and Threat Protection Page Not Available Error?
Despite having quite a few possible reasons to happen, Virus and Threat Protection Page Not Available error is rather easy to fix. All the troubleshooting boils down to understanding why it happened – I’ve named the reasons above. Now, let’s switch to actual troubleshooting.
1. Uninstall third-party security software
Today, most third-party antivirus solutions work well when paired with Microsoft Defender. However, some applications still require disabling the built-in Microsoft Defender to work correctly. If you have a third-party antivirus installed, try uninstalling it.
2. Update Your Windows
Cybersecurity threats evolve constantly, and software vulnerabilities can be exploited by malicious actors to gain unauthorized access or cause harm to your system. Windows updates can resolve existing security problems and ensure your computer runs optimally. It often includes patches and fixes for known security vulnerabilities.
Open Settings from Start and select Update & Security and click Check for updates under Windows Update.
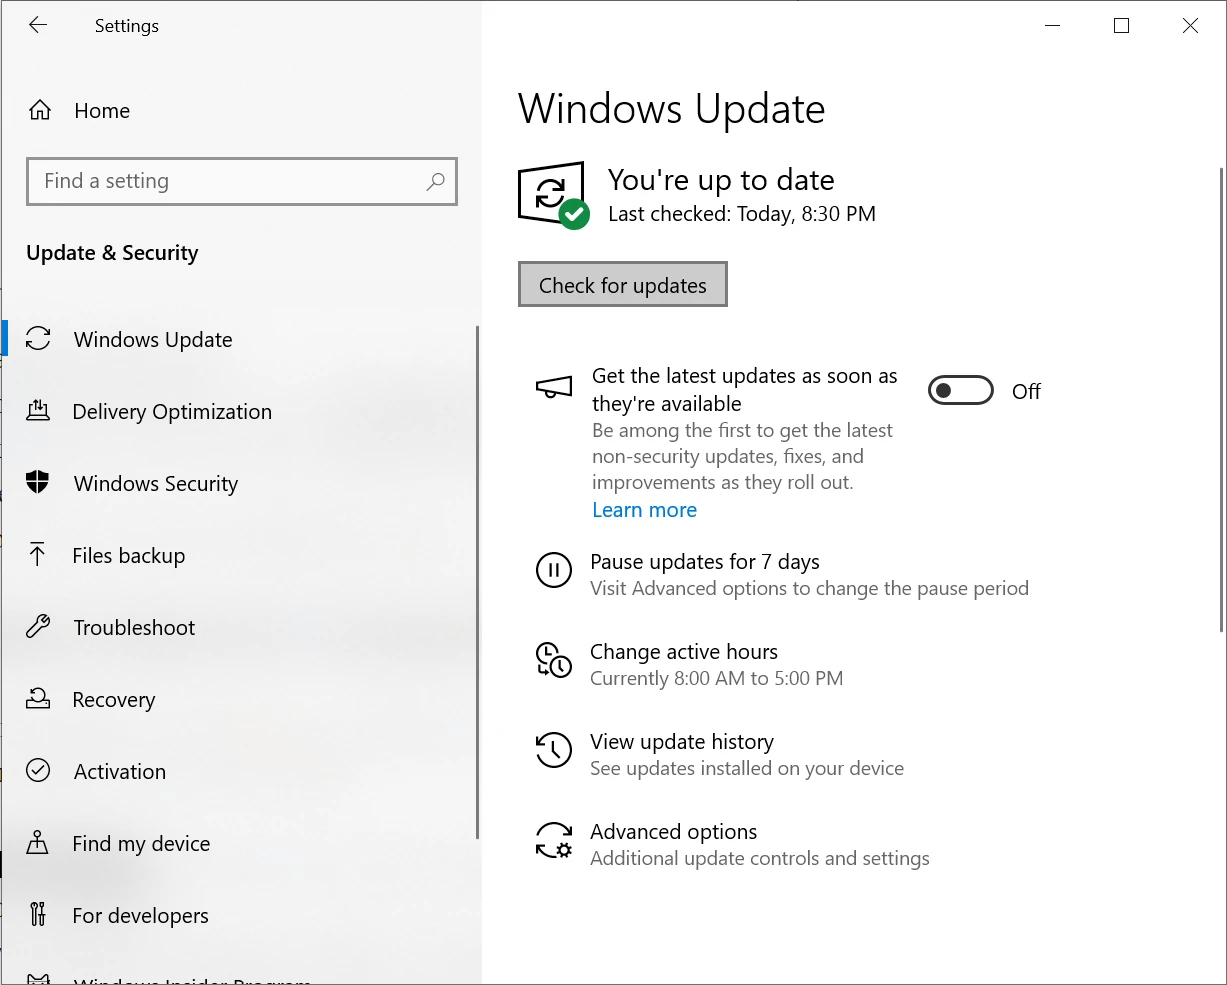
This may take some time, especially if you’ve ignored the latest system updates for some time. Nonetheless, it is worth waiting, as the chances of this solving the issue are high.
3. Repair and Restart Windows Security
Despite Windows being a pretty stable operating system, sometimes uninstalling third-party software can corrupt the Windows Defender files. So, you can try resetting the Windows Security app, which may help run it back (for Windows 11 only).
First, click on the search icon or box on your taskbar. Then, search for “Windows Security.”
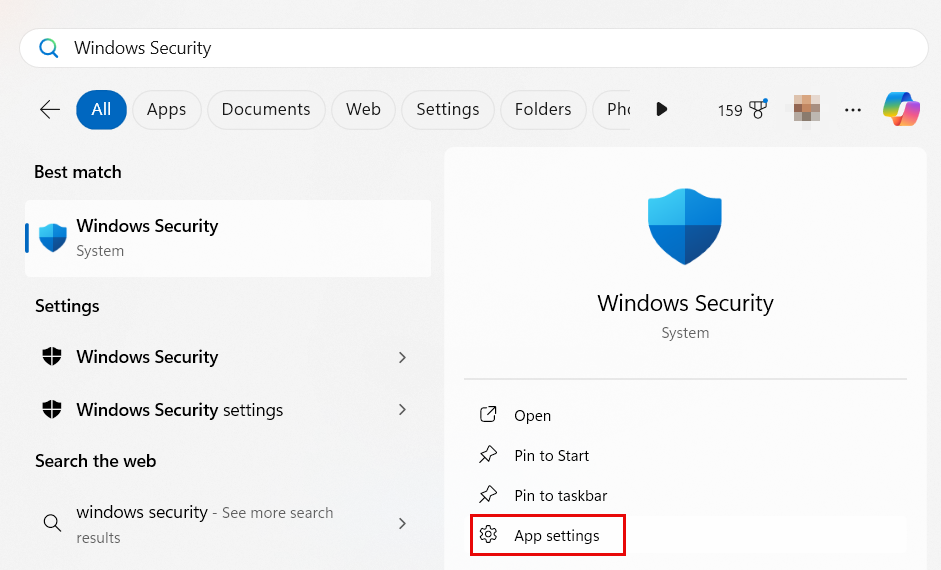
Here, select the Windows Security App and click the “App settings” option on the right panel.
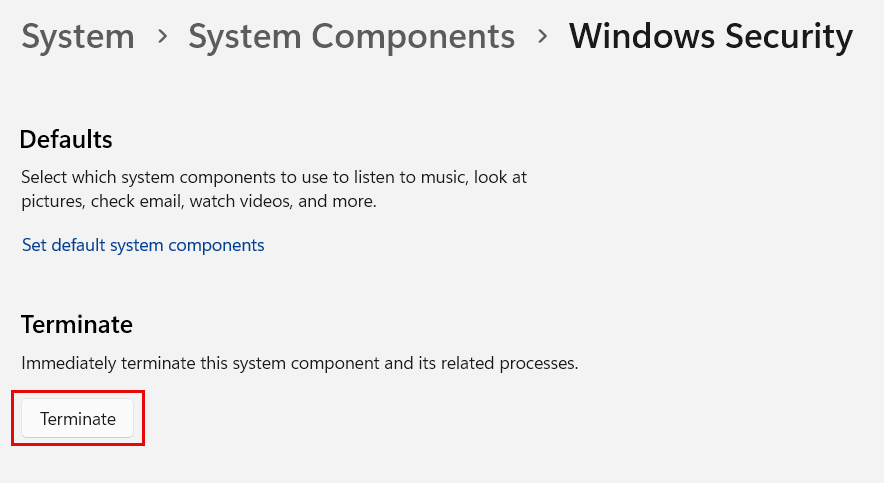
Click on the “Terminate” button. After that, restart your computer to check if the error message is resolved.
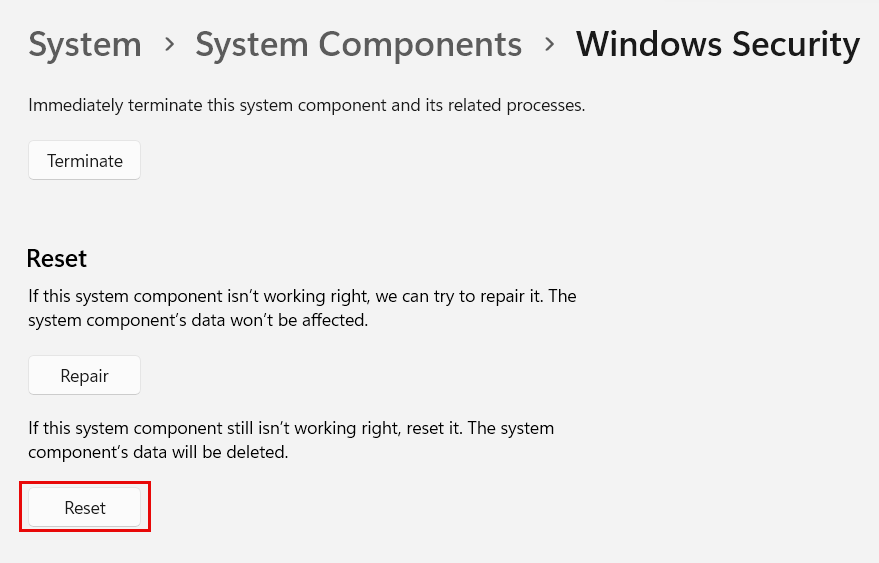
If the issue persists, follow the same steps to access the Windows Security settings interface. Then, click on the “Reset” button to reset Windows Security.
Restart your computer again to ensure all the changes are applied successfully.
These were relatively simple ways of solving the problem that should have helped. However, if the issue of Virus and Threat Protection is unavailable persists, go on to more sophisticated solutions I’ve gathered below.
4. Run SFC and DISM
SFC and DISM are command-line tools that detect and repair system corruptions in Windows. If you can’t find Virus and threat protection on Windows 10/11 due to a system bug or corrupted image, use either tool to fix the issue. To repair your computer, follow these instructions:
Click on the Start menu and search for “Command Prompt”.
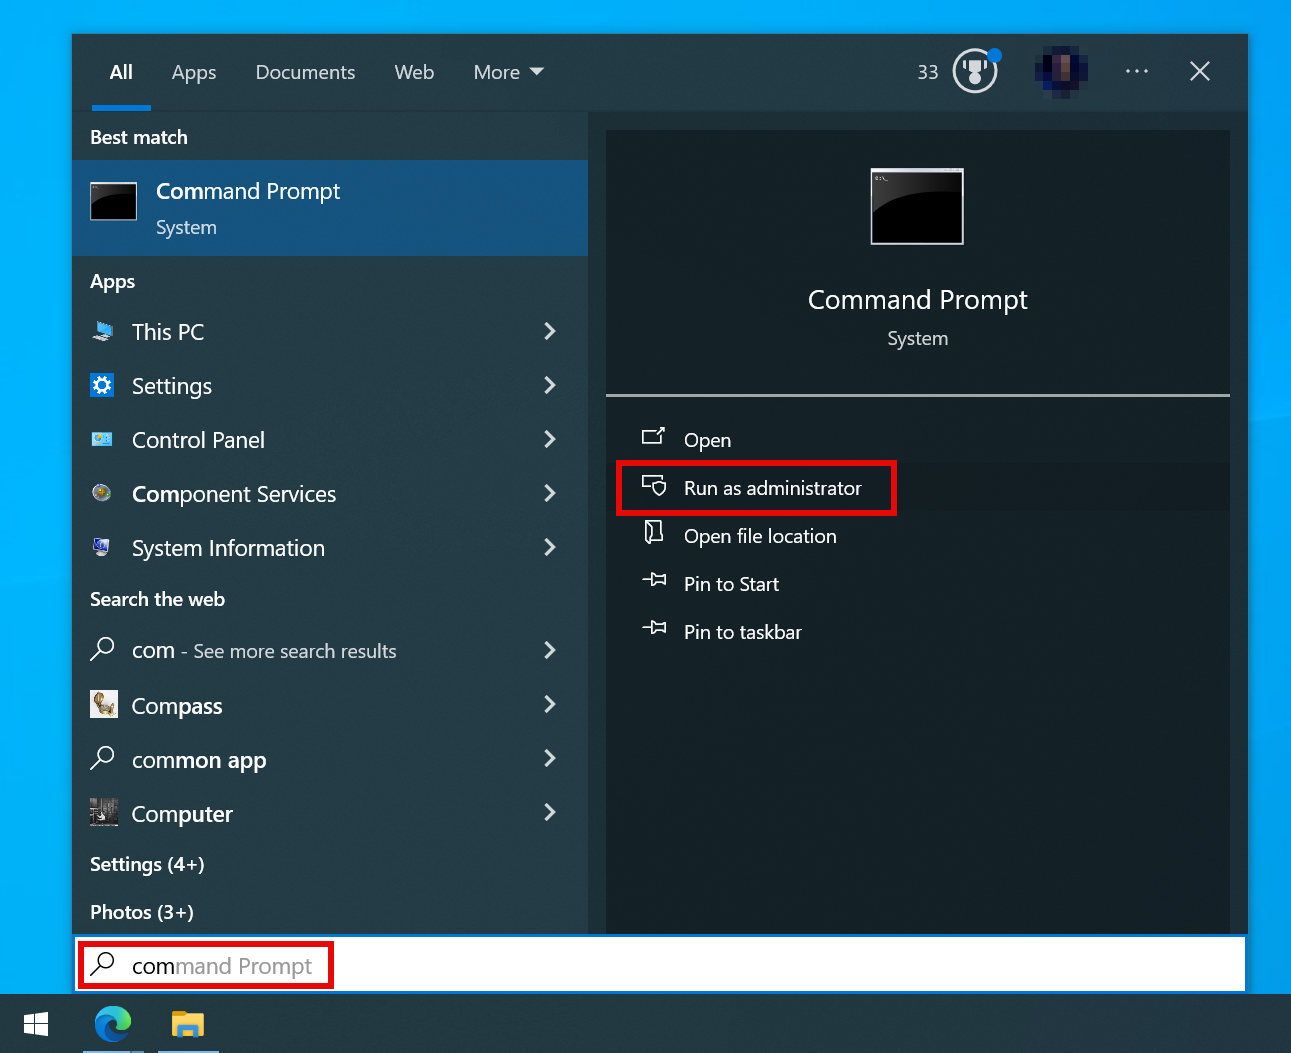
Right-click on “Command Prompt” and select “Run as administrator”.
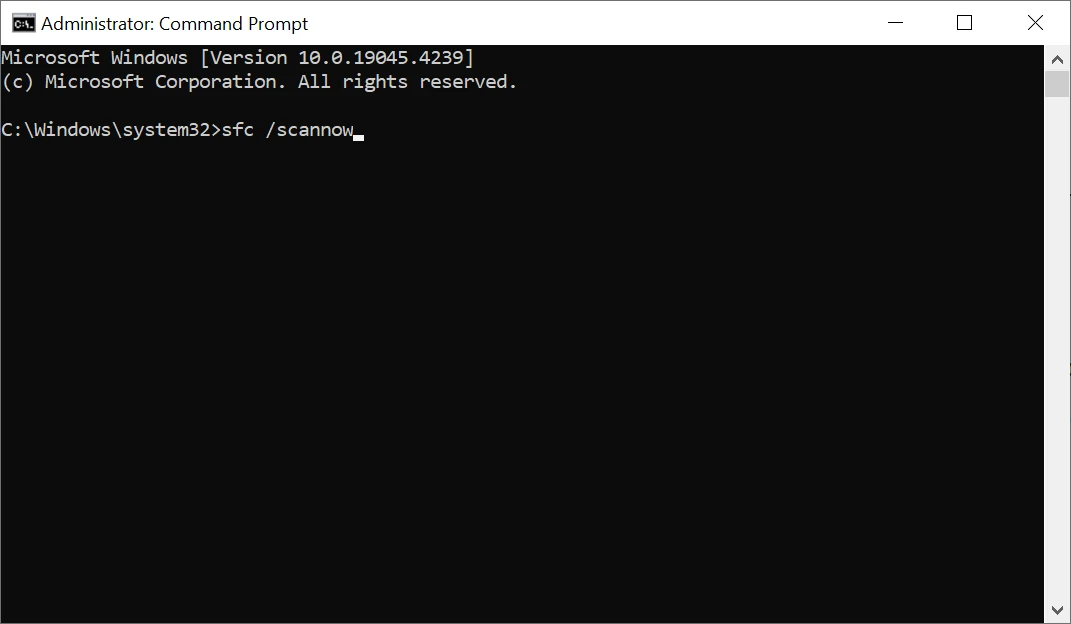
To repair your system files using SFC, enter or paste the following into the Command Prompt window and press Enter: “sfc /scannow“.
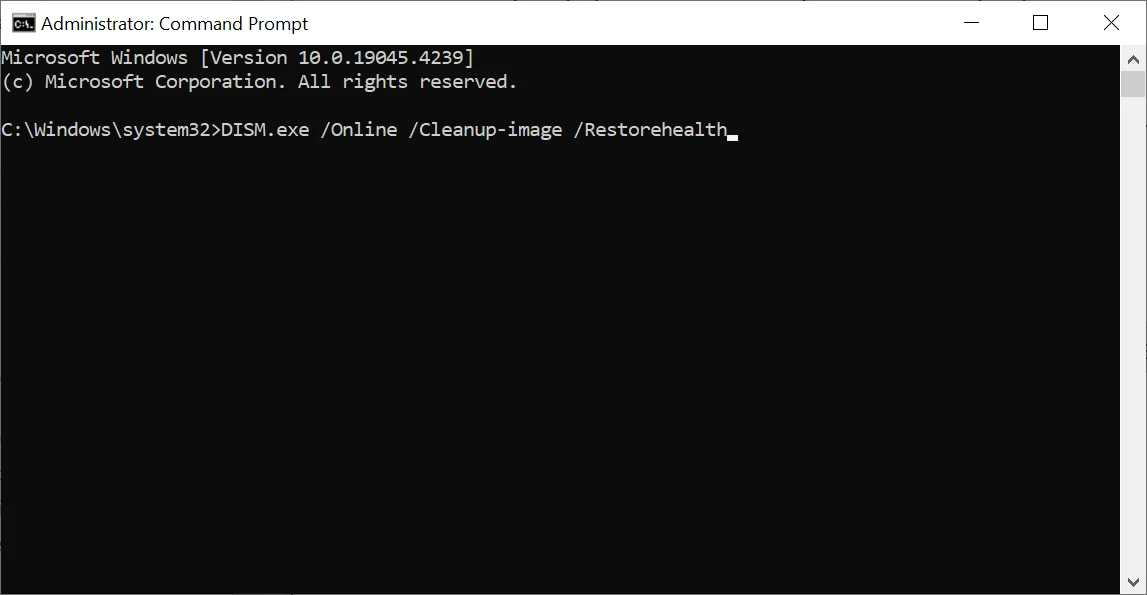
To repair your system files using DISM, enter or paste the command into the Command Prompt window and press Enter: “DISM.exe /Online /Cleanup-image /Restorehealth“.
5. Disable UI Lockdown
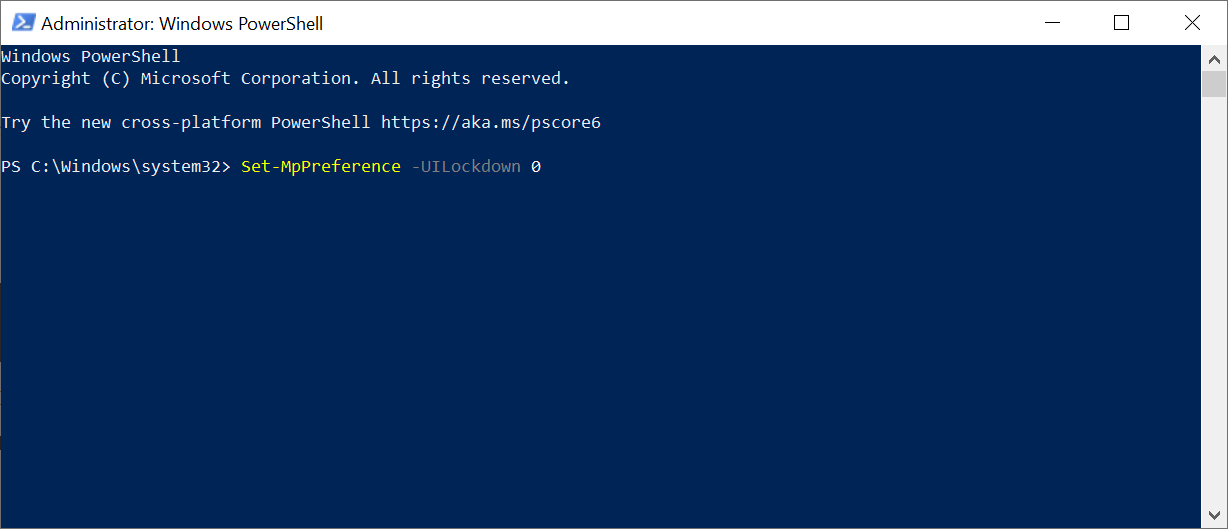
Sometimes, the reason for Virus and Threat Protection Page Not Available issue is a disabled Windows Defender interface. This happens due to the activation of a so-called UI Lockdown. To fix this, run PowerShell as administrator and run the “Set-MpPreference -UILockdown 0” command. This will enable UI, fixing the Virus and Threat Protection Page Not Available issue.
6. Change the registry keys through Regedit
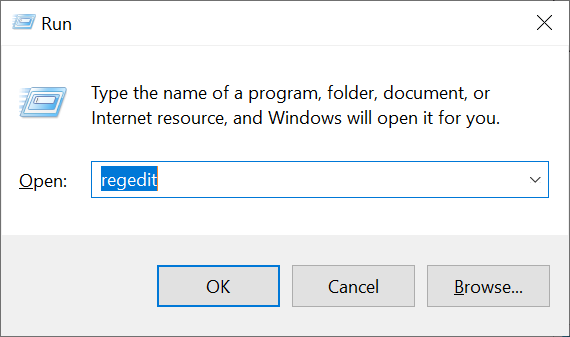
If the issue persists, you can manually add a few values using Regedit. To begin, open Regedit by pressing Win+R and typing “regedit” in the Run dialog box, then press Enter.
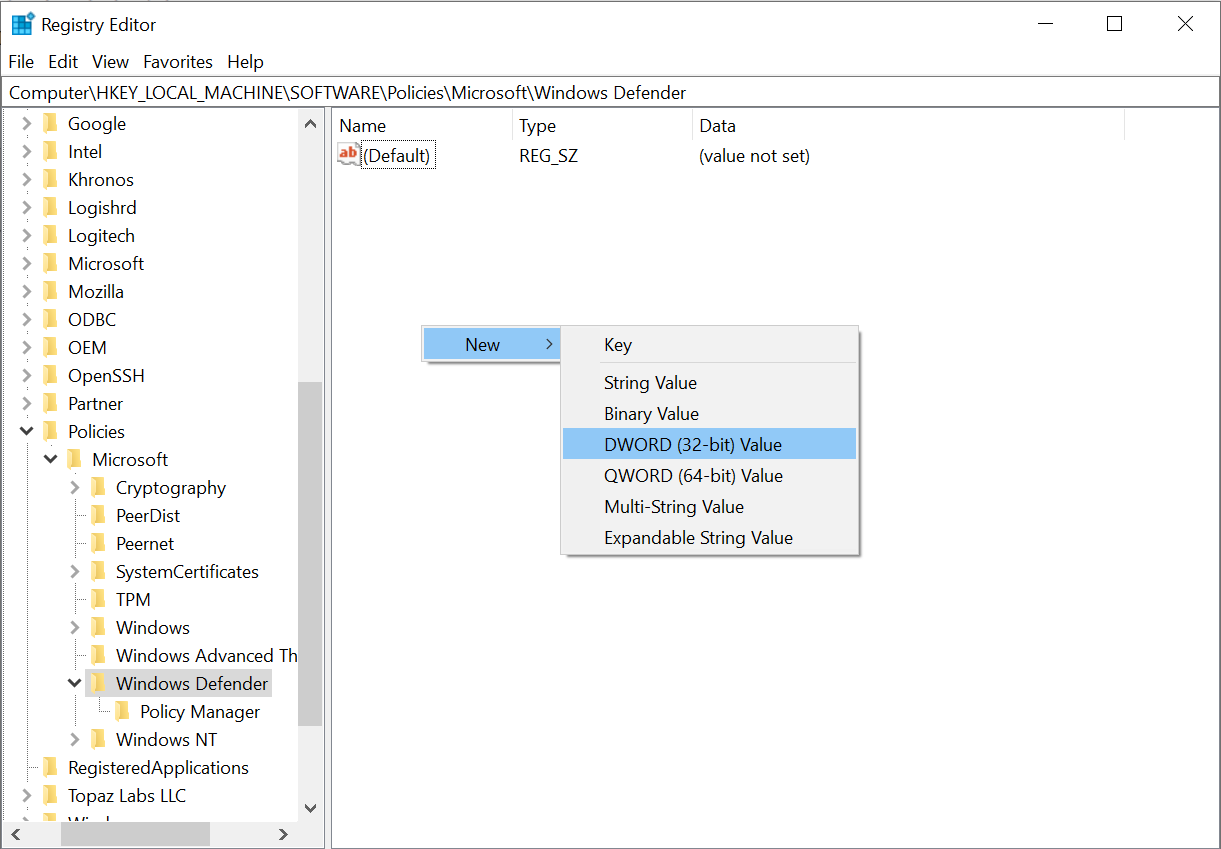
Once you are in Regedit, navigate to HKEY_LOCAL_MACHINE\Software\Policies\Microsoft\Windows Defender. Right-click the empty area and select New → DWORD (32-bit) value.
Next, give the value a name: DisableAntispyware. Similarly, create another value with the name DisableRealtimeMonitoring. Leave the default value of 0 for both values.
Close the Registry Editor and restart your system. After restarting, check if Microsoft Defender is available with its apps.
7. Using Local Group Policy
One more option is adjusting the Local Group Policy, responsible for Microsoft Defender. This may be the result of a malware activity, as well as the effect of an antivirus software conflicting with the Defender. Fixing this requires entering the Group Policies menu.
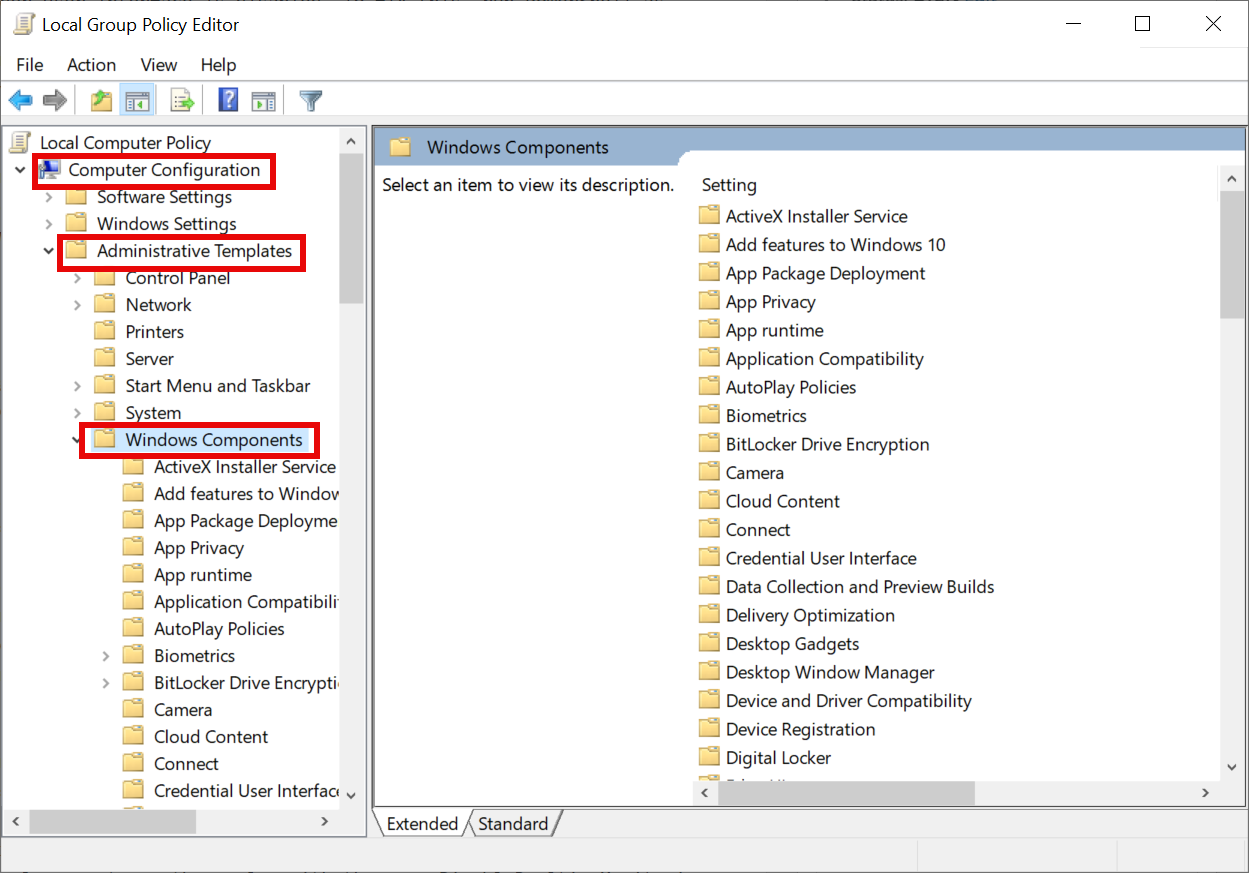
Press the Windows key + R to open the Run dialog box and type or paste this: gpedit.msc. Go to Computer Configuration → Administrative Templates → Windows Components.
Open Windows Security and navigate to the Virus and Threat Protection option.
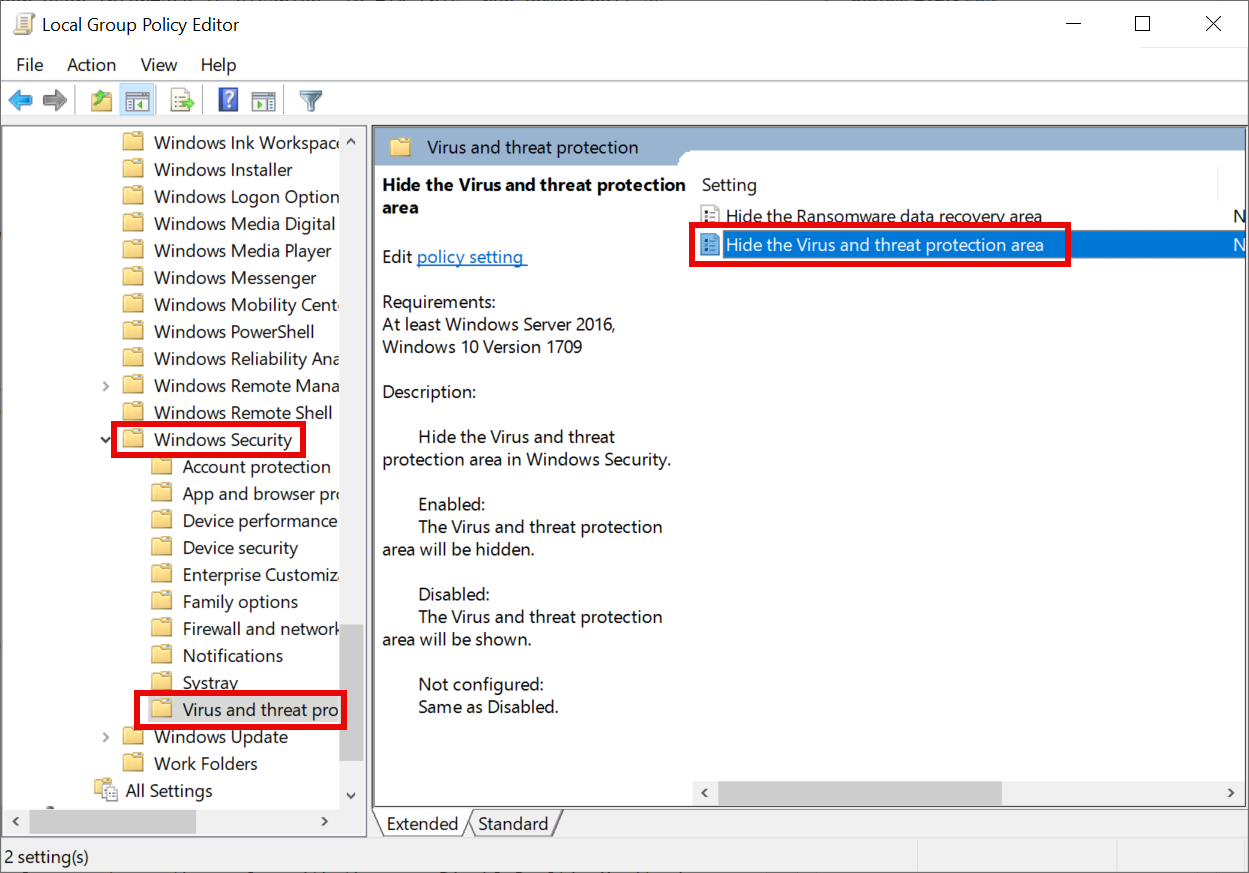
Double-click the Hide the virus and threat protection area and select Not Configured.
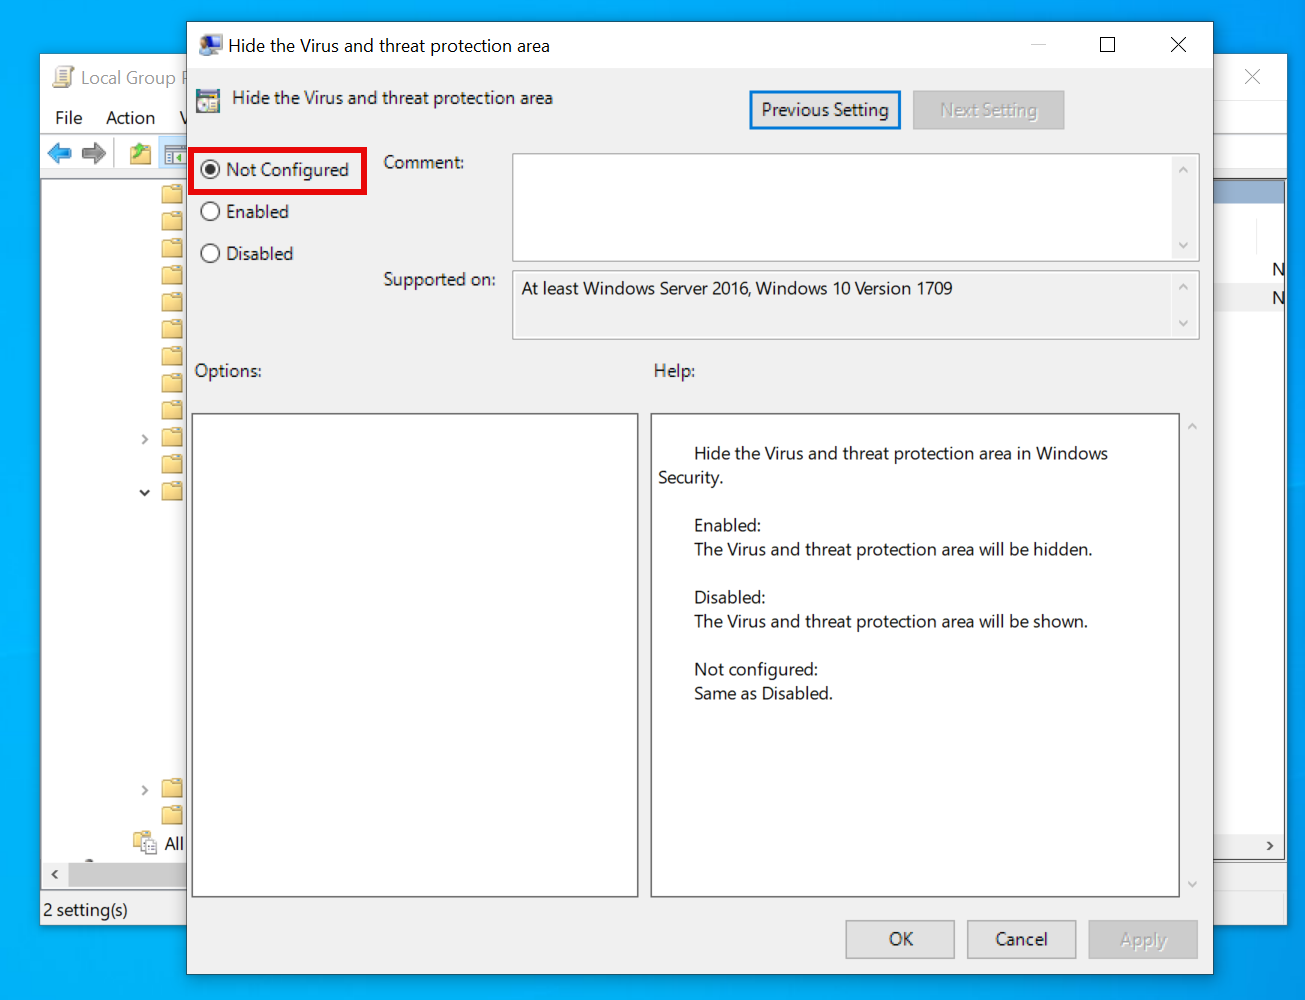
Restart your PC to apply the new settings and try running the feature.
Install Compatible Anti-malware
As I said at the beginning, this could result from malware activity. Most malware targets the built-in Windows defenses, which explains a lot. In such cases, I recommend using a third-party solution. However, it is equally important that the third-party solution works well with the built-in solution.
That’s why I recommend GridinSoft Anti-Malware. It works perfectly with Microsoft Defender and does not burden the system. After installation, run a full scan, which will completely clean the system.
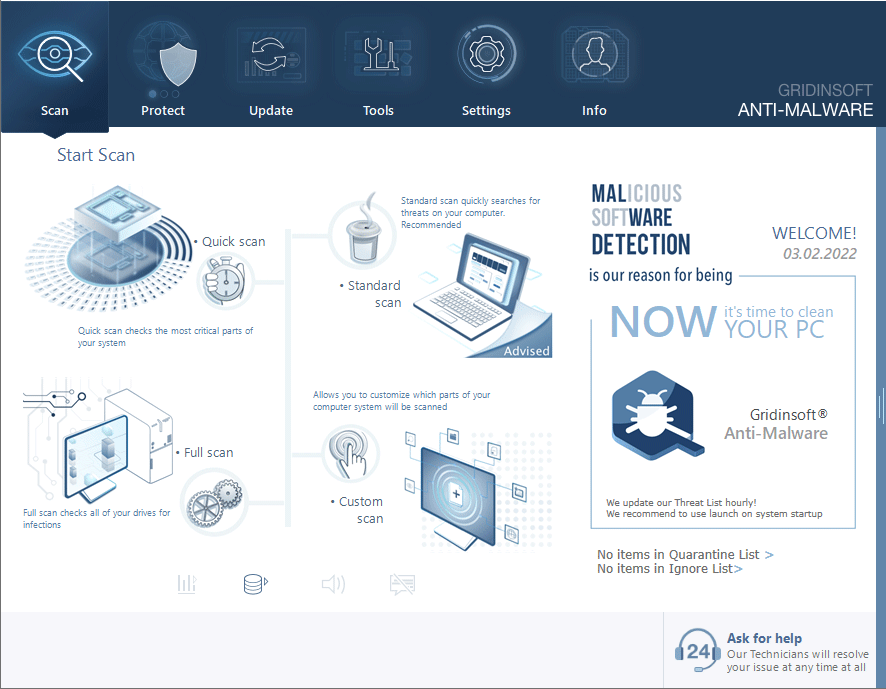
Download and install Anti-Malware by clicking the button below. After the installation, run a Full scan: this will check all the volumes present in the system, including hidden folders and system files. Scanning will take around 15 minutes.
After the scan, you will see the list of detected malicious and unwanted elements. It is possible to adjust the actions that the antimalware program does to each element: click "Advanced mode" and see the options in the drop-down menus. You can also see extended information about each detection - malware type, effects and potential source of infection.
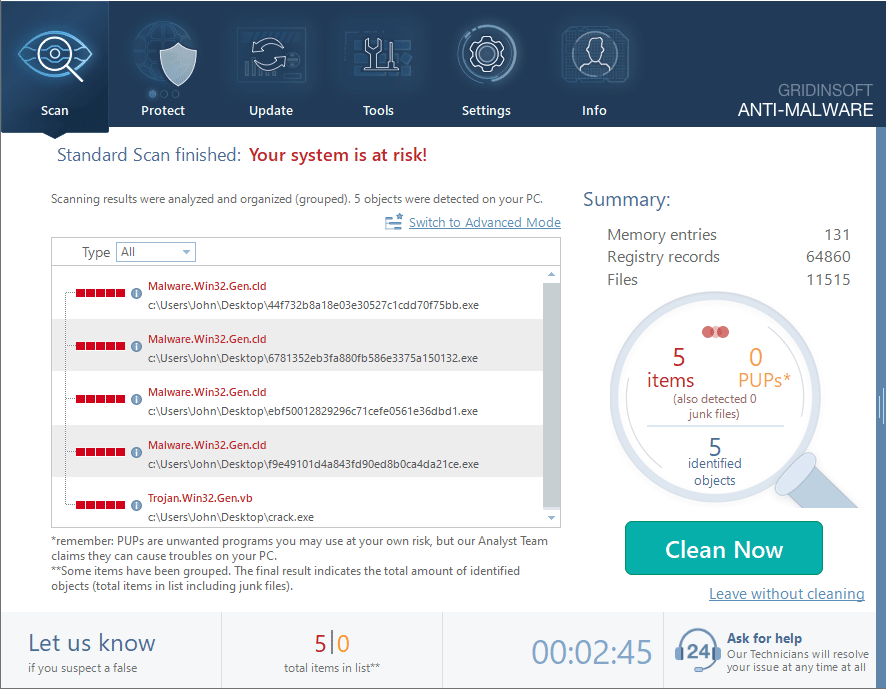
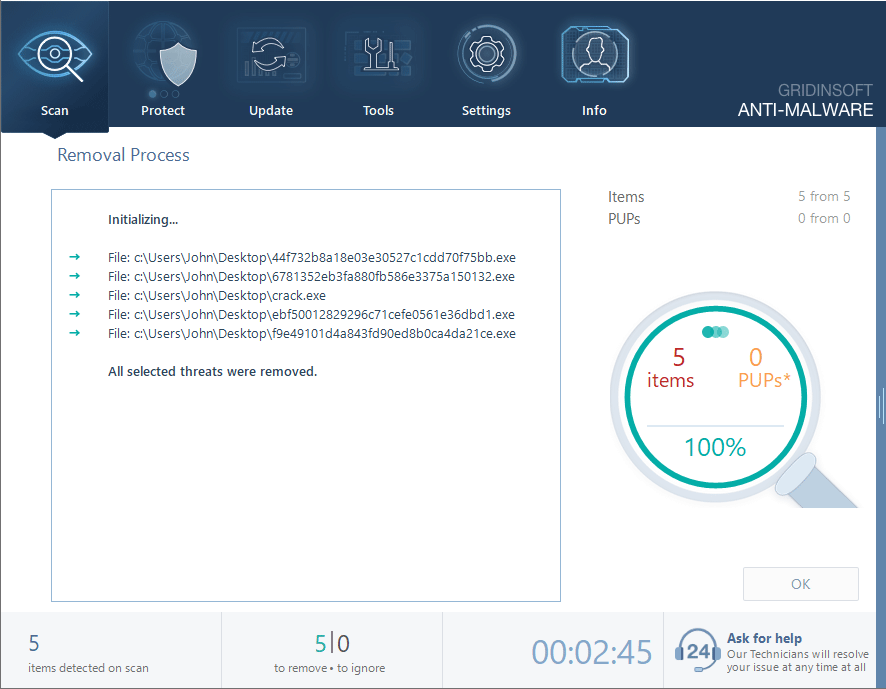
Click "Clean Now" to start the removal process. Important: removal process may take several minutes when there are a lot of detections. Do not interrupt this process, and you will get your system as clean as new.
